Important announcement from Shaderlight

It is with real regret that we must announce that due to circumstances entirely beyond our control Shaderlight Ltd. will cease to trade with effect from the 15th December 2021.

Unfortunately this means that you will not be able to purchase new licences or upgrades after this time.  Customers with existing licenses will be able to continue rendering with Shaderlight however we are no longer able to offer technical support at any level .  In addition, the current version of Shaderlight will not be updated to work with the next SketchUp version whenever that is released.

We’d like to apologise for any inconvenience caused to you and you customers and on behalf of the entire team here, we’d like to thank you for your support over the last 12 years and we wish you well in the future.

Posted in Uncategorized | Leave a comment

A message from us…

To our Shaderlight community


We understand the uncertainty in the world surrounding COVID-19 at the present time and our thoughts are with everyone who’s been affected.

For those of you working at home we wanted to let you know that we’re here to help.

If your company has a Shaderlight network license that you can’t access at the moment please do contact support@artvps.com and we can assist you.

Don’t forget that your Shaderlight license comes with two activations so that you can render on your home computer too!


Stay safe and happy rendering!

The Shaderlight Team

Posted in Uncategorized | Leave a comment

Shaderlight 2020 is here!

Hot on the heels of SketchUp’s 2020 release, the Shaderlight team are pleased to announce our latest version which will install to and run from within SketchUp 2020.

That’s not all you get in Shaderlight 2020 however.  The team have produced a brand new material that combines the features of the old Self Illuminating material type and an associated area light.

Introducing…Light Emitting!

Light Emitting Shapes 1080

Light Emitting is intended to replace both Self Illuminating materials and area lights because they produce the most physically accurate results for less effort. The old material type and area lights have been retained so that existing models continue to work and to support particular non-physical effects (such as invisible light sources).
The new material both visibly glows and emits light that illuminates other surfaces, making it much easier to create accurate light emitting objects.
The Light Emitting material type has two modes of operation – one that uses the underlying SketchUp material to define the emission colour and another that allows the colour to be specified in terms of correlated colour temperature.
What else has changed?
We’ve fixed some dialog layout issues on Windows
Some Windows machines with certain versions of Internet Explorer installed displayed the Shaderlight dialogs (such as Render Settings and the Light and Material editors) with incorrect layout and inoperative controls, making them difficult or impossible to use. We have addressed all of the problems that we could reproduce on our systems but we would be interested to hear of any remaining issues.
We’ve fixed incomplete exports of models with certain texture types
Certain texture types are unable to be exported by Shaderlight and the presence of such textures would prematurely abort the export process, resulting in renders with missing elements or crashes of the Shaderlight render process. These models should now export and render to completion, although the affected textures are still not exported – geometry with the affected textures will render with a flat colour for now. We continue to work on addressing the actual texture export.
We hope you like the new version.  Don’t forget to let us know what you think and send us some of your light emitting images!
Posted in Uncategorized | Leave a comment

Shaderlight 2019 – v7.1. What’s new?

Since the release of Shaderlight 2019 in February we have added some useful feature enhancements to Shaderlight’s real-world lighting functionality.

Don’t forget Shaderlight 2019 fully supports SketchUp 2019 and existing Shaderlight 2019 (v7) license holders can download the update for FREE!

What can you expect to see when you upgrade to this release?

  • Colour temperature picker for lights

Shaderlight 7.1 now enables you to specify the colour of Shaderlight lights by correlated colour temperature with the addition of a colour temperature picker for lights. This new feature makes it easier to render real-world light fixtures that are specified by colour temperature. A variety of presets are also provided for common light types.

  • White balance setting

In the presence of lights with varying colour temperatures it can be useful to adjust the white point of renders to produce images without strong colour tints (or to emphasise a particular colour tint). Shaderlight 2019 (7.1) now includes a new White Balance control in the Render Settings dialog that allows the target white point to be specified.

  • Shaderlight light tool remembers most recently selected light

To make it easier to create lights based on existing lights in a model, the Shaderlight light placement tool now consistently uses the settings of the most recently selected light.

  • Transparent objects can now remain transparent in chalk renders

In previous releases, the ‘chalk’ render mode would make all objects appear white and opaque. In this release, there is a new ‘Transparent glass’ option when chalk mode is active, which makes most transparent objects render in their non-chalk mode. This can make form and massing studies more intuitive when large areas of transparency are used.

  • Shaderlight’s render settings can now be saved independently for each SketchUp scene

The Shaderlight Render Settings dialog now has an option to save the current settings with the active SketchUp scene, making it possible to save different settings for all or some of the scenes in a model.

  • Shaderlight now prevents your computer from entering idle sleep mode while rendering

If a long-running render has been started, it will no longer be interrupted by the computer entering idle sleep mode. Idle sleep is re-enabled after the render completes and the computer can always be forced to sleep manually.

  • Shaderlight now suspends App Nap for the plugin while rendering on macOS

On macOS, the operating system can put a process into ‘App Nap’ if none of its windows are currently visible. This drastically reduces the amount of CPU time it receives and, in Shaderlight’s case, effectively pauses rendering if you switch to another program and cover up the Shaderlight render window. Shaderlight will now ask the operating system not to put it into App Nap while a render is in progress, to ensure that the render completes in a reasonable time.

  • Addition of a 4K UHD output resolution preset

This increasingly common resolution is now easier to select.

  • The Shaderlight Message window has been tweaked so that it remains legible when macOS’s dark mode is in effect

The previous release of Shaderlight introduced a warning if you attempt to close the Shaderlight render window while a render is underway, to help prevent unintended loss of progress. This release extends that warning to the use of the ‘Quit Shaderlight’ menu option.

Start rendering with Shaderlight 2019

A FREE 14 day trial of Shaderlight 2018 is available to download here

Buy Shaderlight

Shaderlight 2019 is now available to buy from our website and our worldwide network of reseller partners

Posted in Uncategorized | Leave a comment

Shaderlight 2018 (v6.2) – what’s new?

We are always looking for ways in which we can make rendering with Shaderlight simpler and save you time.  In the latest update to Shaderlight 2018, released last month, there are a few useful additions to assist your rendering workflow.

Here’s a quick overview of what’s new.

  • More precise adjustment of environment rotation

For a more realistic finish when using lighting environments in your render, it’s important to get an accurate match of the lighting environment and background image.

Shaderlight now includes a numeric entry field in the lighting environment rotation setting allowing you to enter a specific value rather than just using the slider control.  The rotation angle can also be specified as a decimal number, allowing much finer adjustment of the rotation.

sliderimage

  • Warning when closing during render

We all know how frustrating it is to lose work by accidentally closing a window on your computer.   Well, Shaderlight will now warn if you attempt to close the render window while a render is in progress to prevent accidentally losing the progress of a long-running render.

window

  • Always on Top setting is remembered

The Always on Top setting in Shaderlight keeps the Shaderlight window above other windows you have open.  It’s always been a useful tool, particularly when rendering in auto-update mode, however we’ve improved it so that Shaderlight will now remember the Always on Top setting’s state between sessions.

OOT

These are just the latest additions to Shaderlight.  If you’ve not upgraded in a while then why not download our FREE 14 day trial to see what else is new since your last upgrade.

Shaderlight 2018 (6.2) is available as a free update to users already rendering with Shaderlight 2018.  Just download the software from the Update Shaderlight section of our website.

Existing users of Shaderlight 2017 or earlier can upgrade here:

New Shaderlight users can purchase this latest release from our website.


Posted in Uncategorized | Leave a comment

Shaderlight 2018 – Transparent material feature explained

You may have noticed that Shaderlight 2018 includes a new transparent material feature, which delivers greatly enhanced realism when rendering transparent materials such as large bodies of water and thick, solid glass objects.

How it works

The new physically-based model of light transmission is able to calculate the absorption of light as it travels through a body of transparent material, taking into account the amount of material that it passes through. The apparent transparency of an object now depends on the thickness of the object, with thicker objects absorbing more light.

The amount of light transmitted by a material can be controlled for each of the three primary colours, thus allowing the material to tint the light that passes through, as some colours are absorbed more than others.

How to get the best results

In keeping with Shaderlight’s philosophy of making sophisticated renders easy to achieve without requiring arcane knowledge of rendering technology, a wide range of materials can be realised simply by adjusting the SketchUp material colour and opacity.

The SketchUp material colour is used to specify the transmittance for each primary colour, which is further modulated by the SketchUp opacity slider, providing both fine–grained and wide range control. This is a change from previous versions of Shaderlight, which ignored the SketchUp opacity slider when rendering Transparent materials. Low opacity values permit fine control for materials that absorb very little light, such as water and clear glass, while high opacity values allow high absorption rates for materials like heavily tinted glass. Do note, however, that a value of 0% opacity on the SketchUp slider will not generally result in a completely transparent object, and a value of 100% will not necessarily be completely opaque – Shaderlight’s physically-based model means that very thick objects may always be ‘opaque’ and very thin objects may never be opaque.

The new transparent model is applied to the Transparent Solid Glass, Solid Frosted Glass, Liquid and Diamond material presets. The new model is not applicable to the Transparent Thin Glass material, as that represents objects with infinitesimal thickness and hence absorbs a fixed amount of light. We anticipate extending the new model to other material types in future releases.

Rendering glass

The scene below demonstrates the new material model with a pair of wedge-shaped glass blocks. The green block on the left has RGB colour values of (32, 154, 84) and an opacity setting of 73%. The blue block has a colour of (1, 13, 201) and an opacity of 21%.

transparentmaterial

The darker green colour and its higher opacity setting make the left block much less transparent than the right one. Also, you can see that the narrow end of the green wedge is more transparent than the wide end, because the light is travelling through less material and has less chance to be absorbed. This effect is not as apparent on the blue block because its orientation means that complex reflections and refractions are interacting on the sloping face and obscuring the impact of absorption.

Rendering water

The image posted by Shaderlight user Andrew Waddington at https://www.artvps.com/index.php/discuss/viewthread/3076/ illustrates how the new model affects water.

Fall_Lake_and_Loon_Moose_S3Q10_(big)

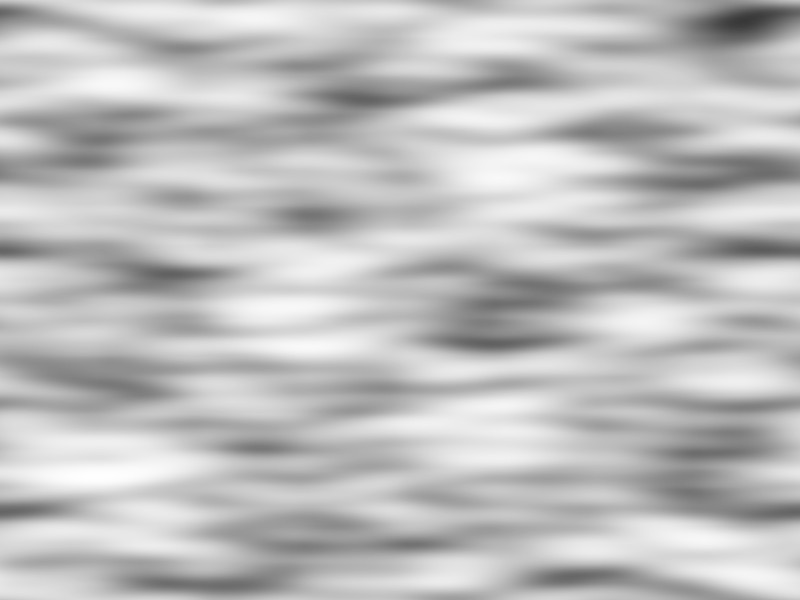
The rocks just below the surface of the water are clearly visible, but as they get deeper in the water, they appear darker. The water material uses RGB values of 214, 216, 194 and an opacity of 30%.  A subtle wave texture is used on the transparent->liquid material and a Bump setting of -1.5 gives the water a rippled surface.

Texture Image:  Andrew used the texture image below which was created using the Solid noise filter in GIMP

waves


Other things to consider when rendering transparent materials

It has always been important to fully model transparent solids so that the volume is fully enclosed, otherwise rays that only pass through one transparent face will be overly refracted, because they never exit the transparent medium. The new model makes this even more important, because the distance-based absorption means that any rays that don’t exit the medium will continue to be attenuated, making objects behind the transparent surface very dark, or black. This doesn’t apply to the Thin Glass material, because that is used for surfaces with no thickness.

The viewpoint is assumed to be located in air, so if you position the viewpoint within a transparent medium, the ‘inside’ and ‘outside’ will become flipped.

Full saturation of any one or two of the colour channels (red, green or blue) is not recommended. This would represent ‘no absorption’ for the fully saturated colour(s) and is probably not physically plausible. Having one or two fully saturated colours can result in over-saturation of objects seen through the transparent material, as only that colour will be transmitted and all other colours will be absorbed, if the object is thick enough. Having all three colour channels fully saturated (i.e. white) won’t result in colouring anomalies, but also won’t result in any attenuation, so again is probably not physically plausible.

The appearance of transparent objects created in previous versions of Shaderlight may change when rendered in Shaderlight 2018. Adjusting the opacity and/or colour should enable the old appearance to be approximated, but an exact match may not be possible, because the distance that light travels through an object is now taken into account.


We do hope you’ve found this useful and we look forward to seeing how you’re using the new feature.  Why not post your images in our forum or on our Facebook or Twitter pages.

Posted in Uncategorized | Leave a comment

Getting the most from Shaderlight for SketchUp

Here at Shaderlight HQ, we’re often asked for our recommendations when customers are choosing a new computer to use for rendering.  It’s an extremely difficult question to answer as every SketchUp model is different, and while we can test Shaderlight on a range of hardware it may have different characteristics to yours.

Taking this in to account we’ve put this post together to highlight some things you may like to consider when looking to spec your new rendering computer, or if you just want to reduce your render times.

Recommended computer specifications:

  • 8 GB RAM (If you are rendering larger resolution images, you may benefit from more RAM, especially if you are working in Auto Update mode. Single (Tiled) mode uses a lot less memory and can be used to render high quality high resolution images even with limited RAM.)
  • 2GHz+ quad-core processor
  • SketchUp 2014 or later

Some things to consider for your new computer:

  • Shaderlight will make full use of a multi-core processor and will use all cores of all CPUs.
  • Shaderlight won’t use the GPU for rendering. SketchUp can use the GPU for its own display, so interactions in SketchUp might benefit.
  • Any given render will require a certain amount of RAM and having more will not improve render times. Having less than that amount will dramatically increase render times as data is swapped on and off the hard drive. Unfortunately, it’s very difficult to predict the amount of RAM needed in advance. In our experience, 8GB is enough for most small-medium complexity scenes at resolutions below 1920×1080. 16GB is enough for more complex scenes at 1920×1080.  As it’s difficult to know beforehand how much RAM you’ll need, it’s worth planning an upgrade path for your future needs.

Some tips to reduce render times:

Try reducing the quality setting.  If you’re rendering at the highest quality setting, try taking it down to 9.  In our experience, rendering at level 10 will take longer and the difference in image quality may not be that significant for your final render.

Review your materials.  If the render has large areas of ‘blurry’ materials in it, render times will increase substantially. ‘Blurry’ materials are those that produce blurry reflections or refractions – for example the ‘Glossy’ (except mirror), ‘Metal / Brushed’ and ‘Transparent / Frosted Glass’ presets. If the blurry reflections aren’t an important part of your image, switching to the ‘Shiny’, non-brushed Metal or non-frosted Glass materials can improve render times.”

Review your lighting.  Getting the correct lighting in your scene is vital to achieve the right look of your final render; however check that you’re not overusing artificial lights.

Shaderlight user Andrew Waddington has written an excellent guide to best practices when lighting interior scenes which you may find useful.

Reduce the amount of detail in your scene.  Taking a fresh look at your model and optimising it for rendering can have a significant effect on render times.  Try to avoid crinkly or curled surfaces where you don’t absolutely need them.

Take a look at cloud rendering.  Rendering using the Shaderlight Cloud service won’t make a single render any quicker if you machine is reasonably powerful, but you can render multiple jobs at the same time, and your computer is left free for other work.

In the end, though, rendering can be very hard for the computer, and Shaderlight does not prevent you from making things as complicated and beautiful as you like.


Posted in Tutorials | Leave a comment

How to create a skylight portal in Shaderlight 2016

In Shaderlight 2016 the old skylight portal placement tool has been replaced by a new version that allows you to pick any pre-existing face as a template for the portal. This makes it possible to create portals of any shape that you can create using any of SketchUp’s built-in drawing tools, or indeed with many third-party extensions.

To create a skylight portal, activate Shaderlight’s light tool and select ‘Skylight Portal’ from the pop-up menu.

window

Then simply click on the face you wish to use as a template. The new portal will be created precisely on top of the clicked face.

portal

By default, the portal will face the same direction as the face you select. It is important that portals face in the direction that sun- and skylight will be travelling in – that is, the front face should be on the ‘inside’ of the enclosed space. The placement tool draws an arrow to indicate the direction of light flow and should point from the outside to the inside when you place the portal. The face under the cursor is also highlighted with a different shade of blue depending on the direction the portal will face – the ‘inside’ is a bright blue and the ‘outside’ is a dull blue.

Helpful hints

If you hold down the shift key while placing the portal, the direction of the portal will be reversed. This is helpful if the template face doesn’t already point in the correct direction.

You can also hold down the control (Windows) or option (OS X) key to erase the template face when creating the portal. Use this when selecting a temporary template face to specify the opening that the portal should cover but that doesn’t otherwise represent any geometry in your model. The standard behaviour is used when the template is a transparent or translucent object (such as a pane of glass) that should remain part of the model. Note that if the template face has an opaque material applied to it and you don’t erase it the portal will be ineffective, because the opaque face will still be blocking the light from passing through.

Posted in Uncategorized | 6 Comments

Thinking outside the box with Shaderlight

As you know, here at Shaderlight we are always keen to share the great work done by our talented users.

A wonderful example was recently sent to us by the clever people at Fruntside.  The animation entitled “think outside the box” is an idea to promote modified shipping containers.

http://www.fruntside.com/think-outside-the-box

Fruntside Think Outside the Box

Manu Whatarangi, a concept designer at Fruntside, told us a little about how he uses SketchUp and Shaderlight.

“I work in the Brand Activation and Mobile Marketing industry in Australia and use Sketchup and Autodesk products to design our Mobile Marketing Units, I then use Shaderlight to render them so that myself and others can pitch them to our clients.  I choose Shaderlight because it’s fast and intuitive to use, just like SketchUp.  I recently created an animation of a basic shipping container that transforms in various ways and hope that you enjoy it!”

Funtside DJ Kombi

Be sure to have flick through some more of Manu’s concepts and renders on the Fruntside website, it really is great to see our users “thinking outside the box!”

Fruntside AMP

http://www.fruntside.com/

Thank you to Manu and the team at Fruntside for sharing their work with us.  If you’d like to do the same, please contact me at kate@artvps.com – we love to see what you’ve been up to!


Posted in Uncategorized | Leave a comment

Shaderlight helps to transform New York City

Ed Wonsek is a full time digital artist who specialises in retail marketing for exclusive New York City cliental.

As an accomplished SketchUp user, it wasn’t until he started using Shaderlight that he finally saw a way he could integrate SketchUp into his workflow and still produce the quality of images his clients expect.

It absolutely blew me away….it was like the first day I discovered SketchUp.

“I primarily used digital matt painting and compositing techniques as my clients loved the effect I could achieve – straddling the line between sketchy and photo-realistic.  Although I used SketchUp, I could never really find a place for it in client work as the raw output was just not up to the standard of my matt painting techniques.”

“Rarely do I get more than a day or 2 from the time I get the phone call from the client to the delivery on an image.  My deadlines are too tight to invest the time in using high end but complex rendering software like Vray.”

“Upon discovering Shaderlight I thought I’d give it a shot.  Having used Podium unsuccessfully in the past I was sceptical however after watching the tutorial videos on YouTube I was able to dive right in to a project.  It absolutely blew me away….it was like the first day I discovered SketchUp.”

The first project that Ed completed with his SketchUp/Shaderlight workflow was the New York Yankees Clubhouse Store, a design which was inspired by the Yankees Stadium itself.  Since then he has produced hundreds of images for some of the most highly respected names in the New York commercial market however he often doesn’t have much to go on at the start of a project.

nyyankees

“The most I typically receive from the client is an existing photo and a brief description of their goals. I take care of everything else from that point on. Often the clients do not include existing conditions CAD files; I use my eye to design and model on the fly

“Fundamentally I am a conceptual artist. The goal is not to achieve photo-realism but instead to quickly create compelling 3D concept sketches that appear to have been created by an entire marketing and architectural team. Shaderlight is the only rendering software that I have used that can keep up with my workflow and deadlines and has, I believe, elevated the work to another level.”

The quality of Ed’s work speaks for itself however he’s been kind enough to share with us some of the detail behind the images he produces.

1530 Broadway Times Square NYC.

This is a current project under development in the heart of Times Square NYC. Since there is no building designed yet tenants are having a hard time signing on for the rent they are asking in Times Square, typically approaching $1,500/sf. At these prices, tenants won’t sign on until they understand what they are getting but owners are not willing to invest in design teams until they know who the tenants are. This work serves as the key to making the deal happen and Shaderlight has been been instrumental in expediting the process.

1530Broadway

1530Broadway2

1530Broadway3

GM Building Ferrari

This is an excellent example of the power of Shaderlight in my workflow. The brokers discovered at the last minute Ferrari was interested in leasing a retail space on 5th Ave but we only had until the end of the day to pitch an idea to them. I realized the key to selling them on the GM Building space vs other opportunities on 5th was that remarkable plaza in front adjacent to the famous Apple cube store. I built the interior model in a few hours and then spent about 20 minutes downloading every exotic Ferrari I could find on 3D Warehouse. The ease of use and power of the Shaderlight lighting and material engine was critical in making those exotic cars the hero of the image. By arranging them in the plaza and along 59th Street, in a matter of hours we had a powerful image showcasing the unique value this property represented to the Ferrari brand. Plus it was great fun!

ferrari

ferrari2

ferrari3

530 Fifth Ave NYC

Lululemon is a great brand to work with because each store is designed differently and are very creative. A tiny boutique store currently uses a Mondrian tile pattern on the exterior so I played off that for this larger scale store which the owner requested be “transparent and bold”. Shaderlight once again allowed me to quickly create a convincing interior that would have been impossible with matt painting. Shaderlight has become the cornerstone of my process at this point. Plenty has been documented regarding it’s capabilities, but what I value most is that it allows me to experiment while simultaneously making my work appear as though it has been produced by an entire team of specialist. Exactly the qualities my clients expect from me.

530fifthave

530fifthave2

Visit www.edwonsekartworks.com for more information about Ed and his work.

Posted in Uncategorized | Leave a comment